As you probably know by now, I like to automate as many things as I can. When I became a homeowner and started thinking about home automation, my first goal was simple: get through the day without touching a light switch. I mostly do now, with one small exception: when I go to bed, I tell Siri good night and turn all the lights off.
The part I enjoy most is how little there is to notice. The lights gradually become brighter as the evening begins. At some point, I look around and realize they are on.
My current setup uses a custom Node-RED flow connected to Home Assistant. An adaptive brightness curve sets a percentage. Each light adjusts it using its own settings. Presence, scenes, and manual overrides decide whether to apply it.
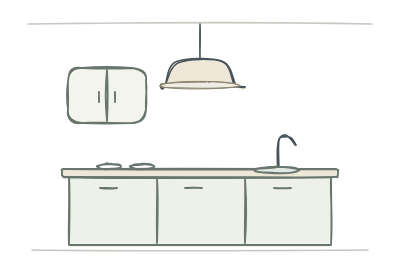
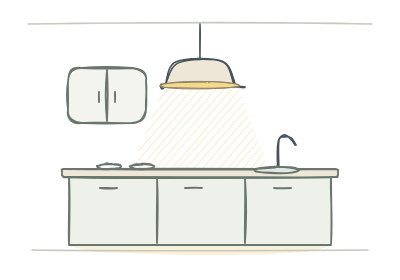
80%
Room occupied
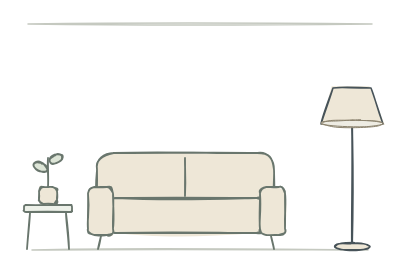
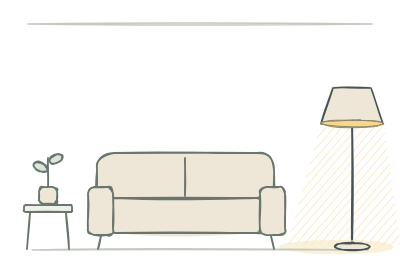
40%
Room occupied
Both rooms occupied · 30-second fades
This flow adjusts brightness only; it leaves color temperature alone. It does not use the third-party Adaptive Lighting integration.
What makes the flow run
Five inputs keep the lighting connected to what is happening in my home: the clock, motion, occupancy, scenes, and location.
The clock recalculates the adaptive brightness once a minute and passes it on only when the rounded percentage changes. Motion and occupancy events select the lights associated with a room. Scene changes trigger a broader update. Those event paths reuse the latest adaptive brightness, within their permitted hours.
Location supplies the home/away context checked before sending brightness to a light. It does not change the curve. The flow then applies each light’s settings and checks whether automation is allowed to act.
Explore what starts an update, then how the flow decides whether to act.
Loading interactive drawing…
An evening curve anchored to sunset
The evening curve begins 80 minutes before sunset and ends at 10:30 p.m. from Sunday through Thursday, or 11 p.m. on Friday and Saturday. A separate flow fetches sunset at startup and each morning.
Those times define an interval. The flow calculates how far the current time has progressed through it, from zero at the beginning to one at the endpoint.
The spline node turns that progress into a curve: rise, hold, then taper. Its output is constrained to zero through one and converted to a rounded percentage.
This percentage comes from the adaptive brightness curve. Individual lights can ask for much less, even when the curve reaches 100%.
A profile for each light
The kitchen ceiling lights and living-room floor lamp in the illustration share the curve but have different profiles. The examples use a falling multiplier of 0.8 for the kitchen. This readable object version groups the defaults together and lists only each light’s overrides:
{
  "defaults": {
    "min": 20,
    "max": 80,
    "rising_multiplier": 1,
    "falling_multiplier": 1
  },

  "lights": {
    "kitchen_ceiling_lights": {
      "min": 15,
      "rising_multiplier": 1.1,
      "falling_multiplier": 0.8
    },

    "living_room_floor_lamp": {
      "min": 15,
      "max": 40
    }
  }
}
Each light inherits any setting it leaves out. The kitchen uses the default 80% cap; the living room uses the default multipliers of 1. Both lower the minimum to 15%.
In the actual Node-RED flow, each profile is stored as an array: [minimum, maximum, rising multiplier, falling multiplier], with -1 inheriting the default minimum or maximum. The object above uses named fields and omissions for readability, with light names matching the illustration. The lookup uses the entity name without light..
The four settings do different jobs:
| Setting | Kitchen ceiling lights | How it affects the target |
|---|---|---|
| Minimum | 15% | Sets a floor in the second half of the interval only. |
| Maximum | 80% | Caps the target in both halves, after multiplication. |
| Rising multiplier | 1.1 | Scales the adaptive brightness: 50% becomes 55%. |
| Falling multiplier | 0.8 | Scales the adaptive brightness: 50% becomes 40%, before applying the floor and cap. |
A multiplier scales brightness. With the adaptive brightness curve at 50% in the first half, the kitchen asks for 55%; the living room hits its 40% cap. One curve produces different targets for different rooms.
The flow calls the multipliers “ascending” and “descending”; I use “rising” and “falling” here. They apply to the first and second halves of the time interval, so the switch can happen while the curve is flat.
Merge the defaults with the light’s overrides, then calculate its target from the rounded percentage on the adaptive brightness curve:
const profile = { ...defaults, ...lights[entity_name] };
const falling = progress > 0.5;

const multiplier = falling
  ? profile.falling_multiplier
  : profile.rising_multiplier;
let target = adaptive_brightness * multiplier;

if (falling) {
  target = Math.max(profile.min, target);
}

target = Math.round(Math.min(profile.max, target));
The minimum applies only in the falling phase, letting the kitchen start at zero and finish with a 15% target. An empty room can still turn off.
The midpoint switches multipliers, but it does not send a command. While the adaptive brightness curve stays at 100%, the kitchen still asks for 80% and the timer’s unchanged-value check suppresses an update. A change in the curve—or an accepted room or scene event—can apply the current target.
What that means in the kitchen
For that Monday, the interval runs from 4:40 p.m. to 10:30 p.m.: 350 minutes. At 5:14 p.m., 34 minutes have elapsed, or about 9.7%. The curve maps that progress to 42% brightness. The kitchen’s multiplier turns 42 into 46.2, rounded to a 46% target.
First read the adaptive brightness curve. Then apply the kitchen light settings.
Loading interactive drawing…
Presence decides when the target matters
Room presence comes from occupancy or motion in the areas associated with a light. For example, the kitchen ceiling lights can respond to presence in either the kitchen or dining room.
First, the flow checks that adaptation is enabled and that manual overrides, guest settings, or scenes do not take priority. Good Night blocks updates. Welcome Back can bypass the room-presence check, while keeping the earlier checks and home/away requirement.
With those checks passed, presence can turn an off light on at its calculated brightness. If all its associated areas are empty, an on light receives an off request.
The room state includes a delay after a sensor clears. New motion or occupancy cancels the pending off, so a brief gap in detection can leave the lights on.
Room-event paths also have their own permitted hours; some remain active later than others. The curve’s endpoint does not turn every light off or disable every room event.
The final request uses Home Assistant’s brightness_pct and transition fields: a percentage and a fade duration in seconds. The empty-room branch requests a 1.5-second fade out.
What still needs work
Cloudy days. Sunset is a useful timing reference, but it does not tell me how bright my home actually feels. When there is less daylight, I want the curve to advance sooner so the lights come on earlier. The current flow has no daylight input, so this is still a future improvement.
Seasonal sunlight. My home is close to a mountain, so the timing and amount of direct sunlight vary through the year. I could potentially calculate the sun’s position relative to the mountain and use that to adjust the brightness curve.
Manual switches. The flow already has logic to remember manual operations and suspend adaptation for a light. Sometimes, though, it does not receive the information needed to record the change. The next automatic update can then override something I just did at the switch. That is frustrating: the logic is there, but it cannot respect a change it does not know about.
Device connectivity. Lutron has been excellent in my home. I have had more connectivity challenges with some other manufacturers. Calculating the right brightness is only part of the job; the device also needs to receive and carry out the request.
There is still work to do, but the everyday result is close to what I wanted: leave the switches alone, and say good night to Siri at bedtime.